Video of the Week:
Rain Barrels: A Great Way to Conserve Water
Upcoming Events:
Great Plains Growers Conference
January 12, 13 & 14, 2017
St. Joseph, MO
For more information, go to http://www.greatplainsgrowersconference.org
January 12, 13 & 14, 2017
St. Joseph, MO
For more information, go to http://www.greatplainsgrowersconference.org
Horticulture 2016 Indexed
All of the articles published in Horticulture 2016 are now indexed according to subject. Indexing by subject is a very time consuming undertaking. One of our Johnson County Extension Master Gardeners, Carole Brandt, has completed this task for us the last nine years. Many thanks to Carole in making these past articles much easier to find. You can access the list at http://tinyurl.com/jb68hbv . (Ward Upham)
Vegetables:
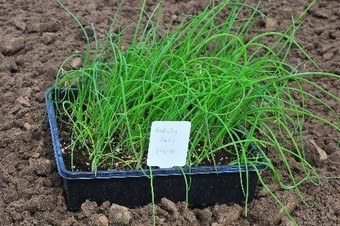
Starting Onion Plants Indoors
It can be difficult to find specific onion varieties in sets or transplants, so growing from seed may be a preferred option. Onions are one of the first plants to be seeded for transplanting because this crop takes a significant amount of time (6 to 8 weeks) to reach transplant size and because they can be set out relatively early (late March in much of eastern and central Kansas). Therefore, we want to start onions in mid- to late-January. Onion seed should be placed ½ to 3/4 inch apart in a pot or flat filled with a seed starting mix.
Place the container in a warm (75 to 80 F) location until young seedlings emerge. Move to a cooler location (60 to 65 F) when the seedlings are 1 to 2 inches tall. Make sure they have plenty of light, using florescent lights if needed. Start fertilizing when the seedlings reach 2 to 3 inches tall using a soluble fertilizer with each or every other watering.
Onion seedlings tend to be spindly with the remains of the seed sticking to the end of a leaf for several weeks. Encourage stockiness by trimming the ends of the leaves when the plants reach 4 to 5 inches tall. Start hardening off the onions in early March by moving the plants to a protected outdoor location. You may have to move them inside temporarily to protect them from extreme cold snaps. (Ward Upham)
Ornamentals:
Extreme Cold and Tree Damage
The extreme cold on December 18 and 19 have people concerned. The 18th (Sunday) was the coldest with a low temperature of -13 degrees in Manhattan. This would not be a concern if there had been consistently cold temperatures earlier. However, the previous Friday our low was 28 degrees. Fortunately, earlier in the week, temps were in the low teens. I think that our trees had been hardened off enough they will be fine but I’m not sure.
Many of you remember the November 10, 2014 freeze when the temperature dropped from 69 degrees to 19 overnight. Damage to trees was spotty and varied but very noticeable. Most trees showed no damage at all. However, an apricot tree in my orchard lost a large branch while another apricot 20 feet away was fine.
Also, damage may not show up right away. We saw all of the following.
- Trees died over winter and didn’t leaf out in the spring.
- Trees leaved out and then either all the tree or a portion of the tree died seemingly overnight.
- Trees looked stressed and then either recovered or died either in 2015 or, in some cases, 2016.
- Trees lost bark but continued to bear leaves until the tree suddenly died. This often occurred late in 2015 or they survived until 2016 and then died.
So, what happened in 2014? I think this is all related to damage to the living tissue under the bark. The sharp drop in temperature killed at least a portion the phloem and the cambium. Remember the phloem carries food made in the leaves to all parts of the plants including the roots. The cambium produces new phloem as well as xylem. Xylem will be discussed later. Now that the phloem is dead and the cambium cannot produce new, living phloem, the roots don’t receive the food needed to survive and eventually starve to death.
Why didn’t these trees die immediately? First of all, a healthy root system has stored energy reserves that it can use to keep the tree alive. When those reserves are depleted, the tree dies very quickly. However, a tree also needs water. Since the living portion of the trunk was killed, wouldn’t this stop water flow? Actually, it would not. This is due to how a tree grows and, specifically, how xylem works. Xylem is the structure that carries water from the roots to the top portions of the plant. Even in perfectly healthy trees, most of the xylem is dead. This dead xylem forms hollow tubes that carry the vast majority of water and nutrients throughout the plant.
Though there are living xylem cells, the contents of those cells make them inefficient in moving water. Therefore, the functional portion of the xylem wasn’t hurt by the freeze because it was already dead. Since this xylem system still works, the tree can live for quite a period of time until the roots starve.
Does that mean a tree with cracking or lost bark will die? It all depends on how much of the living tissue under the bark was killed. If only a small portion was killed then the tree may recover. If the entire circumference was killed, it is done for and there isn’t anything you can do to save it.
Again, I think our trees were hardened off enough to escape damage but it is a “wait and see” situation. (Ward Upham)
Flowers:
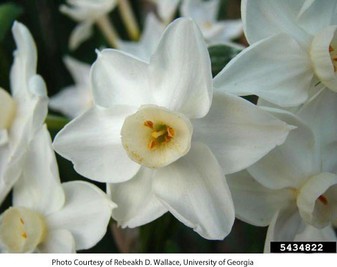
Forcing Paperwhite Bulbs
Paperwhites are a form of daffodil that do not require a chilling period in order to bloom. Therefore, they are very easy to force and bring in to bloom. Following are the steps needed.
• Use a 3 to 4-inch decorative container that does not have drainage holes. It should be transparent enough
that you can see the water level in relation to the bulbs.
• Place 1 to 2 inches of washed gravel, marbles, glass beads or stones in the bottom of the container. We will call the
material chosen as “media” for the remainder of the article.
• Place the bulbs on the media so that they are near one another. Add enough media to hold them in place.
• Add enough water that the bottom of the bulb is sitting in water. Do not submerge the bulb. Maintain the water at this level. It normally takes 4 to 8 weeks for the bulbs to bloom.
Unfortunately, paperwhites often become leggy and fall over. Growing in cooler temperatures (60 to 65 degrees) can help but there is another trick that can be useful and involves using a dilute solution of alcohol. No, this trick did not come from an unknown source on the Internet but Cornell University’s Flower Bulb Research Program. They suggest the following to obtain a plant that is 1/3 shorter than normal. Flower size and longevity are not affected.
• Grow the bulbs as described above until the shoot is green and about 1 to 2 inches above the top of the bulb.
• Pour off the water and replace it with a 4 to 6% alcohol solution.
• Use this solution instead of water for all future waterings.
There are two methods to add this solution. The first is to add the alcohol solution to what is already in the container. Add enough to bring it up to the proper level. The second will give shorter plants. In this second method, pour off all the old solution and replace it with the new each time additional solution is needed.
So, how do we make the alcohol solution? An easy way is to use rubbing alcohol. Rubbing alcohol is usually 70% alcohol and should be mixed with 1 part alcohol with 10 or 11 parts water.
Do not use beer or wine as the sugars present can interfere with normal growth.
The researchers were not sure why this worked but suggested the alcohol made it more difficult for the plants to take up water. This water stress stunted growth but did not affect the flowers. (Ward Upham)
Miscellaneous:
Starting Garden Transplants from Seed
January is often a cold and dreary month for many gardeners. However, planning for and starting vegetables and flower transplants from seed can make this a much more interesting time of year.
Following are the steps needed to be successful in seed starting.
Purchase Recommended, Quality Seed: Start by taking a look at our recommended varieties at
http://www.bookstore.ksre.ksu.edu/pubs/L41.pdf . These plants have proven themselves across the state of Kansas and this is a good place to start when deciding what to plant. However, also talk to your neighbors, friends and garden center about what has worked well for them. Obtain your seeds from a reputable source including garden centers and seed catalogs. If choosing seeds from a business that does not specialize in plants, pay special attention to the package date to make sure the seed was packaged for the current year. Though most seed remains viable for about 3 years, germination decreases as seed ages. See the accompanying article on using old garden seed for more detailed information.
Determine the Date to Seed: There are two pieces of information that needs to be known in order to determine the date to seed transplants: the target date for transplanting outside and the number of weeks needed to grow the transplant. The target date for transplanting the cool-season crops such as broccoli, cabbage, cauliflower and onions are the end of March to the beginning of April.
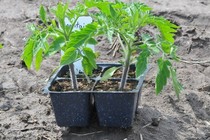
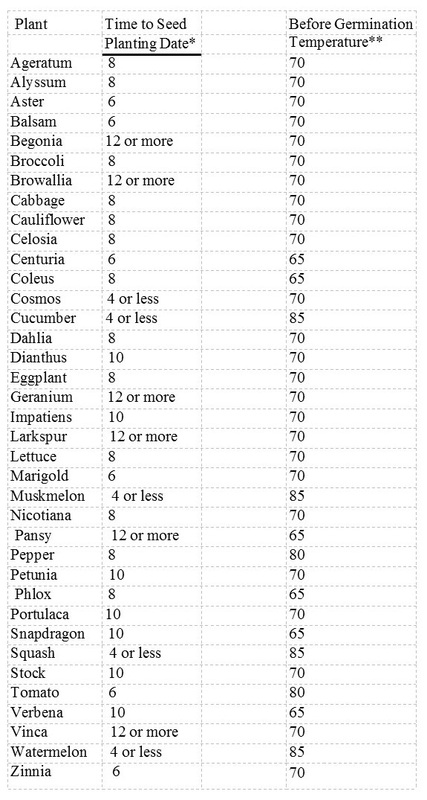
Warm-season crops like tomatoes, peppers and most annual flowers are usually planted about May 10. There is a companion article in this newsletter listing common plants and the number of weeks needed to grow a transplant. Northern Kansas may be a week or so later than
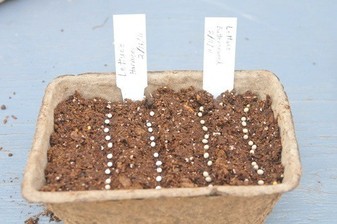
Sowing Seed: Do not use garden soil to germinate seed as it is too heavy and may contain disease organisms. Use a media made especially for seed germination.
Keep Seed Moist: Seed must be kept moist in order to germinate. Water often enough that the media never dries. Using a clear plastic wrap over the top of the container can reduce the amount of watering needed. Remove the wrap after the seedlings emerge.
Light: Most plants will germinate in either darkness or light but some require darkness (Centurea, Larkspur, Pansy, Portulaca, Phlox and Verbena) and others require light (Ageratum, Browallia, Begonia, Coleus, Geranium, Impatiens, Lettuce, Nicotiana, Petunia and Snapdragon).
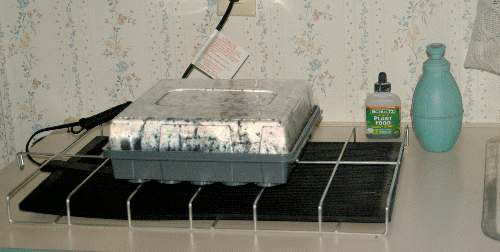
All plants require adequate amounts of light once emergence occurs. South facing windows may not provide adequate amounts and so fluorescent fixtures are often used. Suspend the lights 2 to 4 inches above the top of the plants and leave the lights on for 16 hours each day.
Temperature: The temperature best for germination is often higher than what we may find in our homes especially since evaporating moisture can cool the germination media. Moving the container closer to the ceiling (top of a refrigerator) can help but a heating mat is best for consistent germination. A companion article lists common plants and their optimum germination temperature. After plants have germinated, they can be grown at a cooler temperature (65 to 70 degrees during the day and 55 to 60 degrees at night). This will help prevent tall, spindly transplants.
Plant Movement: Plants react to movement. Brushing over the plants with your hand stimulates them to become stockier and less leggy. Try 20 brushing strokes per day. However, brushing will not compensate for lack of light or over-crowding. Plants grown under inadequate light will be spindly regardless of any other treatment.
Hardening Transplants: Plants grown inside will often undergo transplant shock if not hardened off. Plants are hardened off by moving them outside and exposing them to sun and wind before transplanting occurs. Start about two weeks before transplanting and gradually expose the plants to outside conditions. Increase the number of hours and degree of exposure over the two-week period. (Ward Upham)
Following are the steps needed to be successful in seed starting.
Purchase Recommended, Quality Seed: Start by taking a look at our recommended varieties at
http://www.bookstore.ksre.ksu.edu/pubs/L41.pdf . These plants have proven themselves across the state of Kansas and this is a good place to start when deciding what to plant. However, also talk to your neighbors, friends and garden center about what has worked well for them. Obtain your seeds from a reputable source including garden centers and seed catalogs. If choosing seeds from a business that does not specialize in plants, pay special attention to the package date to make sure the seed was packaged for the current year. Though most seed remains viable for about 3 years, germination decreases as seed ages. See the accompanying article on using old garden seed for more detailed information.
Determine the Date to Seed: There are two pieces of information that needs to be known in order to determine the date to seed transplants: the target date for transplanting outside and the number of weeks needed to grow the transplant. The target date for transplanting the cool-season crops such as broccoli, cabbage, cauliflower and onions are the end of March to the beginning of April.
Warm-season crops like tomatoes, peppers and most annual flowers are usually planted about May 10. There is a companion article in this newsletter listing common plants and the number of weeks needed to grow a transplant. Northern Kansas may be a week or so later than
Sowing Seed: Do not use garden soil to germinate seed as it is too heavy and may contain disease organisms. Use a media made especially for seed germination.
Keep Seed Moist: Seed must be kept moist in order to germinate. Water often enough that the media never dries. Using a clear plastic wrap over the top of the container can reduce the amount of watering needed. Remove the wrap after the seedlings emerge.
Light: Most plants will germinate in either darkness or light but some require darkness (Centurea, Larkspur, Pansy, Portulaca, Phlox and Verbena) and others require light (Ageratum, Browallia, Begonia, Coleus, Geranium, Impatiens, Lettuce, Nicotiana, Petunia and Snapdragon).
All plants require adequate amounts of light once emergence occurs. South facing windows may not provide adequate amounts and so fluorescent fixtures are often used. Suspend the lights 2 to 4 inches above the top of the plants and leave the lights on for 16 hours each day.
Temperature: The temperature best for germination is often higher than what we may find in our homes especially since evaporating moisture can cool the germination media. Moving the container closer to the ceiling (top of a refrigerator) can help but a heating mat is best for consistent germination. A companion article lists common plants and their optimum germination temperature. After plants have germinated, they can be grown at a cooler temperature (65 to 70 degrees during the day and 55 to 60 degrees at night). This will help prevent tall, spindly transplants.
Plant Movement: Plants react to movement. Brushing over the plants with your hand stimulates them to become stockier and less leggy. Try 20 brushing strokes per day. However, brushing will not compensate for lack of light or over-crowding. Plants grown under inadequate light will be spindly regardless of any other treatment.
Hardening Transplants: Plants grown inside will often undergo transplant shock if not hardened off. Plants are hardened off by moving them outside and exposing them to sun and wind before transplanting occurs. Start about two weeks before transplanting and gradually expose the plants to outside conditions. Increase the number of hours and degree of exposure over the two-week period. (Ward Upham)
Using Old Garden Seed
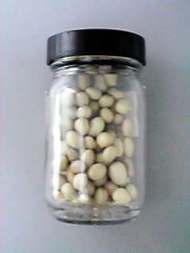
Seed stores best if kept in a cold, dark, dry location. We normally consider seed will remain viable for about 3 years under these conditions though there are exceptions. For example, members of the carrot family (carrots, parsnips and parsley) are short-lived and are usually good for only 1 to 2 years. If you are unsure of viability and have plenty of seed, there is an easy method of determining how good your seed is. Place 10 seeds on a paper towel moistened with warm water and cover with a second moistened towel. Roll up the towels and place inside a plastic bag with enough holes for air exchange but not so many that the towels dry quickly. Place the bag in a warm place such as the top of a refrigerator. Remoisten towels with warm water as needed. After the first week, check for germination. Remove sprouted seed and check again after another week. Add these numbers together to determine the percent germination. (Ward Upham)


 RSS Feed
